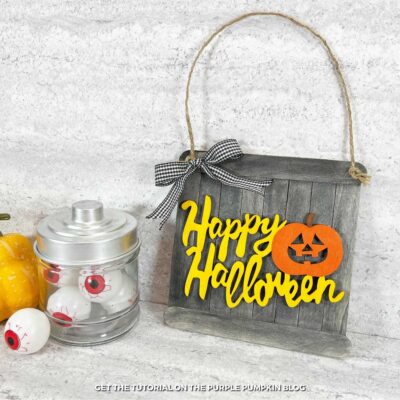
Craft Stick Happy Halloween Sign
Create a festive Craft Stick Happy Halloween Sign with this easy-to-follow tutorial! Perfect for adding Halloween flair to your decor, this DIY project uses affordable supplies and simple steps to make a charming sign ideal for any spooky celebration.
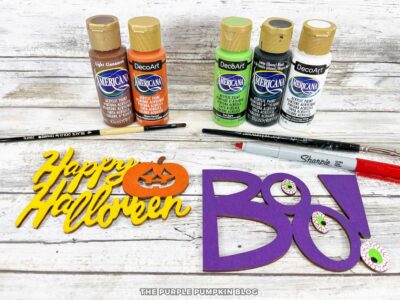
Materials
- Jumbo Craft Sticks
- Wooden Words
- Black and White Gingham Ribbon
- Natural Jute Twine
TOOLS
- Acrylic Craft Paint Black, Yellow, Orange, Brown
- Baby Wipe or Wet Paper Towel
Instructions
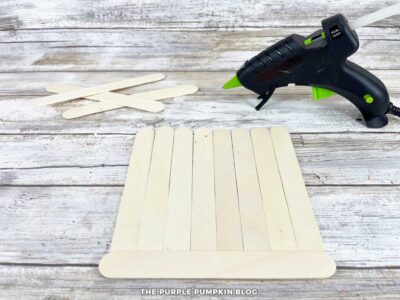
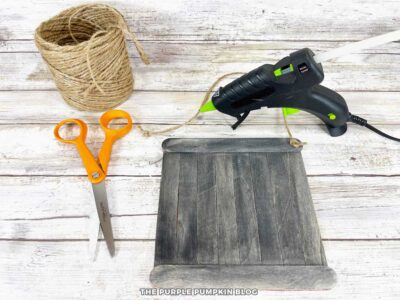
- To create the sign, line up eight jumbo craft sticks vertically on your work surface. With a glue gun, attach two additional craft sticks horizontally to the top and bottom. Flip the sign over and glue two more craft sticks to match the ones on the front.
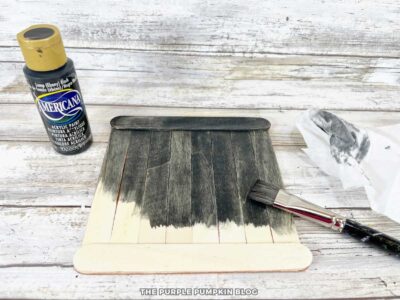
- Lightly basecoat the craft stick sign with black paint. Wipe off the excess with a baby wipe or wet paper towel. This will allow the grain of the wood to show through. Set aside to dry.
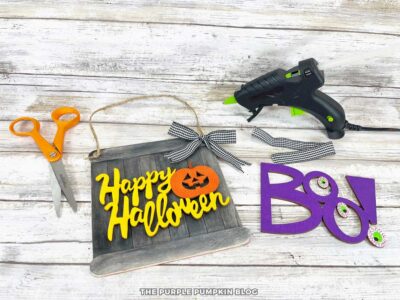
- Paint the Happy Halloween section of the wooden word with yellow paint. Let dry, and apply a second coat, if necessary.
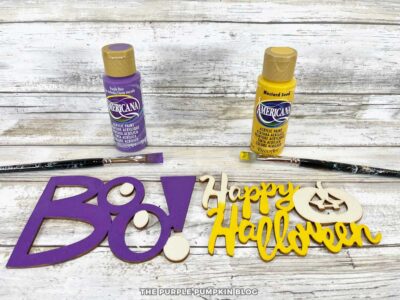
- Paint the Jack-o'-lantern orange and the stem brown.
- Measure and cut a 10"/25cm length of twine. Attach it to the back of the craft stick sign with a glue gun and glue sticks. Tie an 8"/20cm length of ribbon into a bow. Set it aside
- Glue the painted Happy Halloween words and the bow to the front of the sign. Trim any long ribbon ends with scissors.
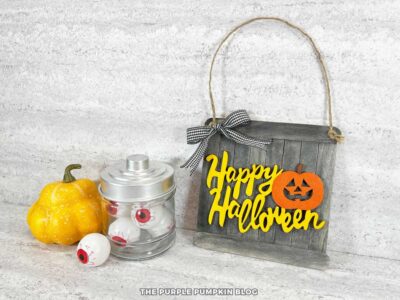
- Display where desired, and Happy Halloween!
Handy Tips & More Ideas
Handy Tips & More Ideas
- Switch It Up—If you bought a pack of words for this project, you can change them out by securing them to the signboard with Velcro Dots (hook and loop dots). Ensure you place them in the correct place on all the words to match the ones on the board.
- Pre-Paint the Craft Sticks—If you’re crafting with a group and pressed for time, paint the craft sticks in advance. This ensures they are dry and ready to go when it’s time to assemble the base of the sign. Alternatively, use Acrylic Paint Pens, which will dry more quickly.
- Pre-Cut Ribbon and Twine—Another time-saving step.
- Use Liquid Glue for Safety—For younger children, swap the glue gun for liquid craft glue. It may take longer to dry, but it’s safer for little hands.
- Get Creative with Colors—While bright orange, purple, and green are classic Halloween colors, feel free to mix it up! Try metallic paints or even Glow-in-the-Dark Paints for an extra spooky effect.
- Mix Paint Colors for a Custom Look—Experiment by mixing shades of acrylic paint to achieve unique Halloween colors like spooky purples or eerie greens. Add a bit of white to make the colors lighter or a touch of black to make them darker.
- Add Glitter for a Magical Touch—Sprinkle glitter on the sign after painting for an enchanted sparkle. Just make sure the paint is still wet to ensure the glitter sticks. Alternatively, use Glitter Glue Pens to add detail to the bottles.
- Seal the Paint for Durability—Protect the painted sign with a clear sealant like Mod Podge. This makes it more durable, especially if you plan to use them as long-term decorations.
- Customize with Embellishments—Use craft foam, stickers, sequins, and other embellishments to add your style to the sign.
Did you make this project? Share it!Tag @_ThePurplePumpkinBlog on Instagram with the hashtag #TPPBCreate!