
Clay Pot Candy Corn Craft
Create this Budget-Friendly Clay Pot Candy Corn Craft using basic supplies—no crafting expertise needed! It’s a sweet project the whole family can enjoy together.
Materials
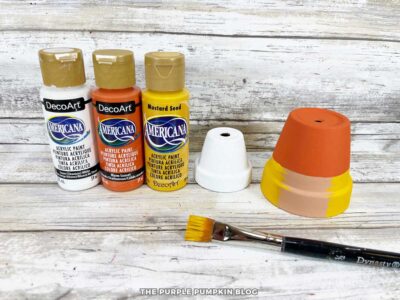
- 1 Clay Pot 2.5"/6cm in diameter
- 1 Clay Pot 3.5"/9cm in diameter
- Acrylic Craft Paint White, Orange, Yellow, Pink
- Scrap of White Cardstock or Paper
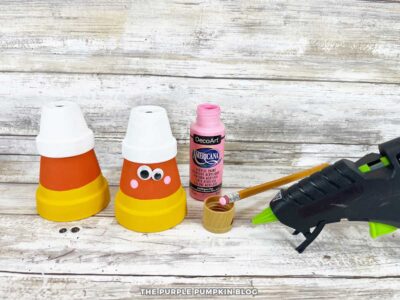
- 2 Googly Eyes
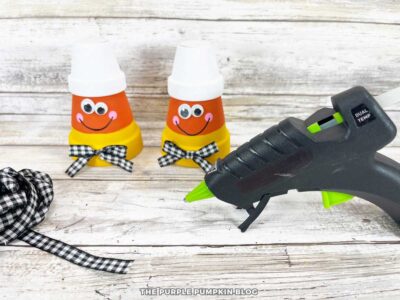
- Ribbon Black and White Gingham
TOOLS
- Pencil with a New Eraser to use as a dotting tool
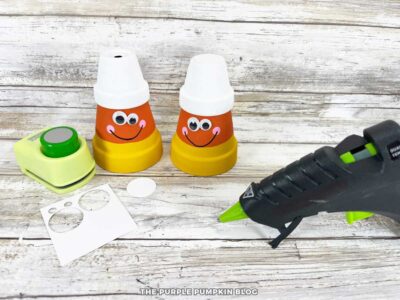
- Circle Punch
Instructions
- Gather all materials and remove any packaging or labels. Basecoat the smaller (2.5") pot with white paint. Paint the larger (3.5") pot with orange on the top two-thirds and yellow on the bottom third. Let dry, then apply a second coat if needed.
- Use hot glue to attach the smaller white pot (top) to the larger orange and yellow pot (bottom). Allow the glue to set.
- Glue two goggly eyes to the front of the pot. For rosy cheeks, dip a new pencil eraser into pink paint and stamp circles just below the eyes Use a black marker to draw a smiling mouth between the cheeks.
- Cut or punch a circle from white cardstock or paper to cover the top hole of the clay pot. Glue it in place.
- Tie a small gingham ribbon bow and attach it below the face using hot glue. Trim ribbon ends neatly.
- When completely dry, display your Clay Pot Candy Corn. Happy Halloween!

Handy Tips & More Ideas
Tips
- Paint multiple pots at once to create a candy corn family in different sizes!
- Use craft foam instead of cardstock if you prefer a sturdier topper.
Variations
- Try non-traditional colors like pastel candy corns for a fun twist.
- Or make them for other holidays, like red, white, and green for Christmas; or red, white, and blue for Fourth of July.
- Add glitter or sealer for a glossy, long-lasting finish.
Display Ideas
- Arrange on tiered trays or mantels.
- Pair with faux pumpkins and autumn leaves for a complete fall vignette.
Did you make this project? Share it!Tag @_ThePurplePumpkinBlog on Instagram with the hashtag #TPPBCreate!