
Chinese New Year Firecrackers Craft
Use the free printable template to make a string of Chinese New Year firecrackers!
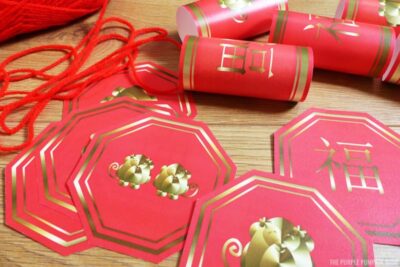
Materials
- White Card or White Paper
- Red Wool/Yarn
- Gold Wool/Yarn
- Free Printable Template links in blog post
TOOLS
- Roller Glue
- Double-Sided Tape
- Sticky tape
- Paper Clips
Instructions
- Print off 2 octagonal toppers of your choice, and 20 individual firecracker tubes onto good quality (120gsm/30lbs) thick paper or onto thin card. Cut pieces out.
- To assemble the firecrackers, roll around to form a tube, and seal with either some double-sided sticky tape or roller glue. If you are using regular glue, you may want to use a paper clip to hold them in place as they dry.
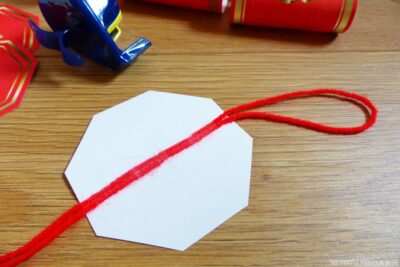
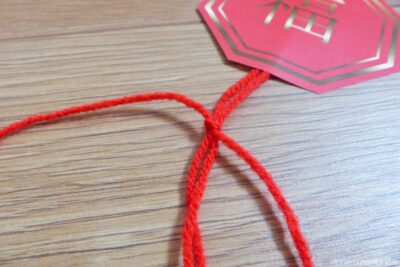
- Measure out approximately 2m (6½ft) of red wool and fold in half. Stick the looped end to the back of the octagonal piece with sticky tape. Stick another octagon on the back to cover the workings, and leave enough of the loop so that you can hang up the string of firecrackers.
- Cut 10 x 30cm (12″) lengths of red wool, and tie them to the long piece of wool at about 5cm (2″) intervals. These are the pieces of wool that you’ll attach the firecracker tubes to. Even if you double knot them, you can still slide the pieces of wool up and down to place the firecrackers where you want when finished.
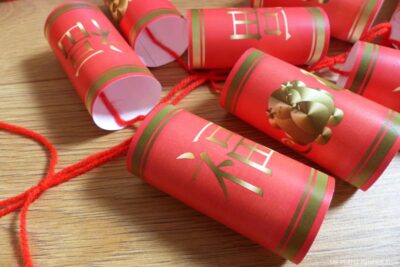
- Attach one tube to one of the wool extensions with some sticky tape, (I stuck them inside of the tube). Cut off any excess wool if you need to. Continue attaching the tubes to the wool extensions until you have used all of them up.

- You can end the string of firecrackers here if you want, or you can continue to make a tassel. To do that, cut about 10 pieces of red wool, 30 cm (12″) in length. Holding them all together, fold them over, and tie another piece of wool around the looped end to hold them all in place. Use that to then tie to the firecrackers. You can then wrap gold wool around the knot to hide it if you wish.

Did you make this project? Share it!Tag @_ThePurplePumpkinBlog on Instagram with the hashtag #TPPBCreate!