Yoshi Eggs – Nintendo Party
Home » CREATE » Crafts » Party Decorations »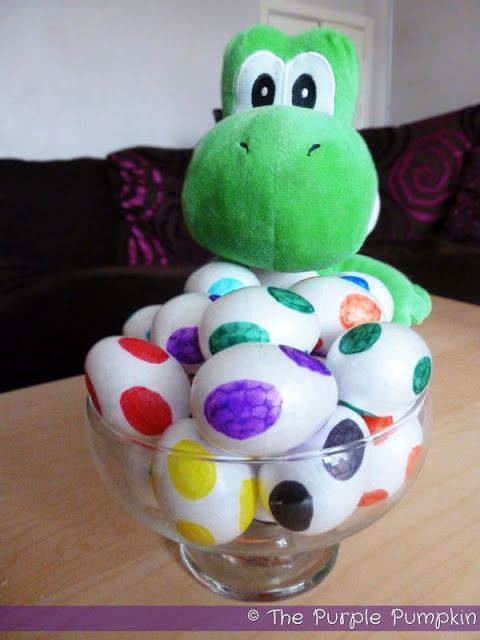

It’s quite handy that stores start selling Easter goodies well in advance – it means I was able to buy some polystyrene eggs and decorate them to use for my son’s Nintendo themed birthday party!
My Sunday Inspiration post really gave me lots of ideas that I made my own, and the Yoshi eggs was one of them. They were super easy to make, and so effective for a Nintendo party!
You need a bunch of polystyrene eggs – I bought mine from Poundland, but I’m pretty sure at this time of year you’d find them in craft shops too.
.JPG)
You also need coloured markers – I used Sharpie pens as they are permanent and dried quickly on the polystyrene eggs. Yoshis comes in all different colours – and so do their eggs! If you want to do a mixed bag of eggs, then you will need purple, red, orange, light blue, green, black, yellow, dark blue and pink…you will see that I have pink missing – because I lost my pink sharpie >_<
Even if you don’t do a mix of colours, make sure you at the very least make green Yoshi eggs!
.JPG)
With everything ready to go, it’s time to get colouring! I don’t have any progress photos I’m afraid, but it’s as simple as drawing large dots, evenly spaced around each egg – one colour per egg. I did one side, let it dry for a few seconds before moving around. The ink does take a few moments to dry off – if you don’t do this, you’ll end up with coloured ink all over your fingers.
.JPG)
Once you have coloured in your desired amount – I made 24 eggs – display them any way you see fit. I popped all mine in a bowl. I was originally going to put them in a basket, but the basket was way too big.
.JPG)
I have a Yoshi plush, so he guarded the eggs! I thought that they came out great! One of my favourite decorations for this party I think!
.JPG)
.JPG)
.JPG)
