How To Make Story Stones with Uni-ball Posca Pens
Home » CREATE » Crafts »I was recently inspired to make a set of Story Stones after I had spent an afternoon doing some arts and crafts with my 4 year old niece. Whenever she comes over to see us, she will always make a beeline for the box of craft supplies that I have for her. On this occasion I had something different for us both to try out – uni-ball POSCA Pens. These pens can write on virtually any surface, making them an ideal choice for all types of artwork!
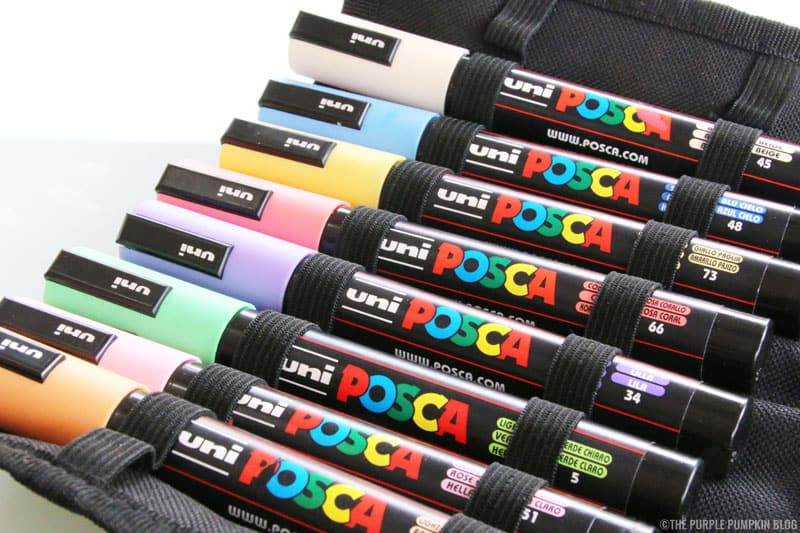
POSCA pens can write on fabric, glass, terracotta, wood, ceramic, clay, plastic, and metal, and won’t bleed through paper. The markers use water-based pigment ink to produce poster-paint-like vibrant colours, that are both lightfast and water-resistant. POSCA Pens are available in pin, chisel, bullet and brush tips and a huge range of colours. POSCA is easily removed from glass, making it ideal for temporary signs and window art.
For the full range of how the pens work on various materials, as well as tips on how to make them permanent on surfaces like ceramics or fabric, check out the POSCA website here.
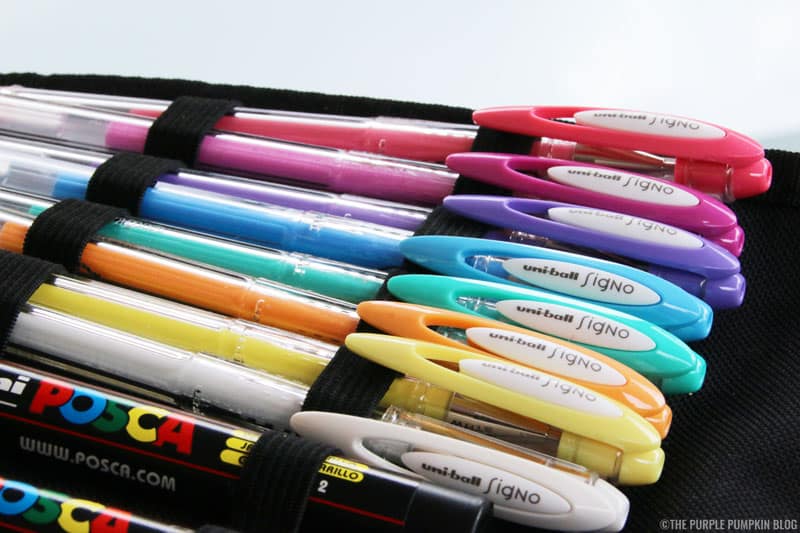
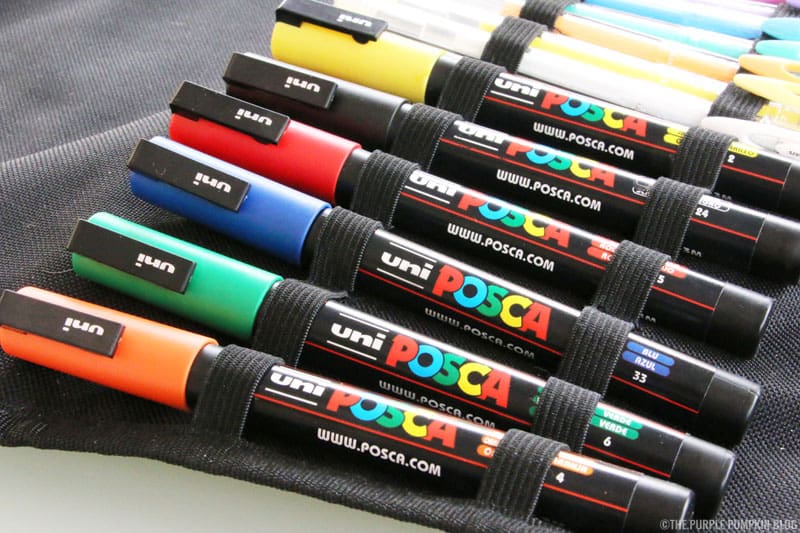
With a variety of colours and tip shapes and sizes, as well as their versatility to work on nearly all surfaces, these pens have quickly become favourites of mine! Uni-ball kindly sent me a selection of their pens to try out, and use in arts and crafts at home.
![How To Make Story Stones! This is a fun way to tell and make up stories with children. Paint objects and characters onto stones and use them to tell a favourite story - like the beloved Very Hungry Caterpillar! Or a classic fairy tale like The Three Little Pigs. Story Stones can help [you and] your child be creative and learn the art of story telling. Using paint pens like Posca Pens makes things a lot easier (and less messy!) than regular paint. Use varnish to prolong their life. Once you start painting them, you won't want to stop! Have fun!](https://www.thepurplepumpkinblog.co.uk/wp-content/plugins/wp-fastest-cache-premium/pro/images/blank.gif)
What are Story Stones?
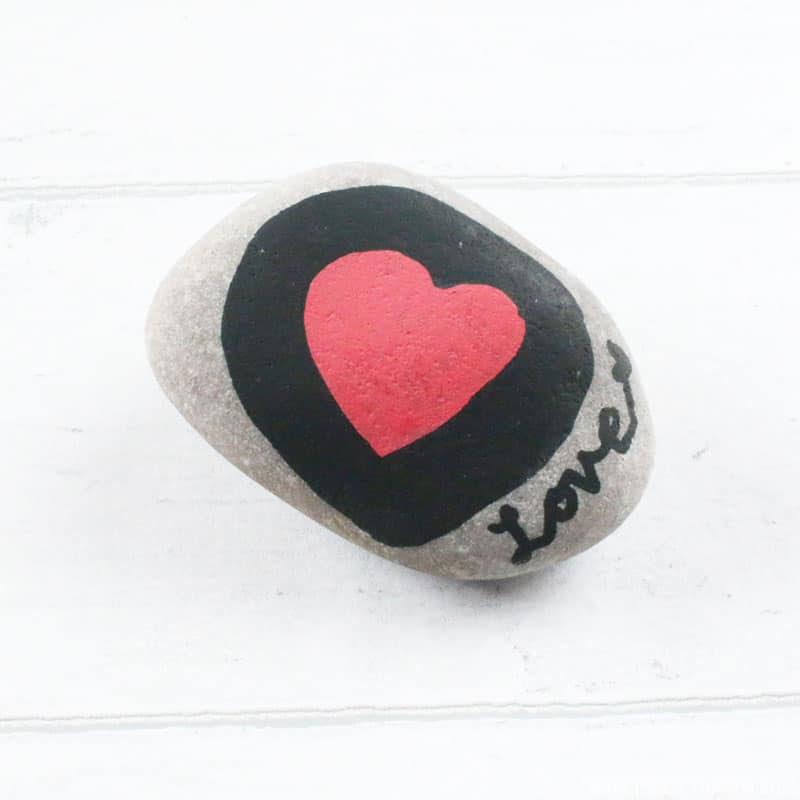
Simply put, they are decorated stones that you use to tell a story – it could be classic fairy tales like The Three Little Pigs or Snow White; or modern classics like The Gruffalo or The Very Hungry Caterpillar; or decorate the stones with random objects and characters and make up your own story!
Story Stones spark the imagination, and can help [you and] your child be creative and learn the art of story telling. Using paint pens like Posca Pens makes things a lot easier (and less messy!) than regular paint. If you feel you’re not to skilled at drawing, you could use stickers or printed images instead and mod podge them to the stones so that they have longevity.
You could store the stones in individual tote bags for each set of story stones you make – or have them all in one big bag/box and pull out random stones to make up different stories. Whichever way you choose to use make and use story stones, you and your child(ren) will have a lot of fun! I know we did!
Using POSCA Pens to paint on stones
I mentioned at the top of the post that I spent some time with my niece, Sephy using these pens. In fact, even the adults – her parents, and my husband also had a go! I’d bought a huge bag of stones from our local DIY shop – £6 ish for 22kgs! It is a mixed bag of shapes and sizes, so if you’re after very flat stones, they are available at craft shops and online, but are more expensive. I used the cheap stones simply because I couldn’t wait for an online delivery to arrive – I’m too impatient and wanted to get started on this project!
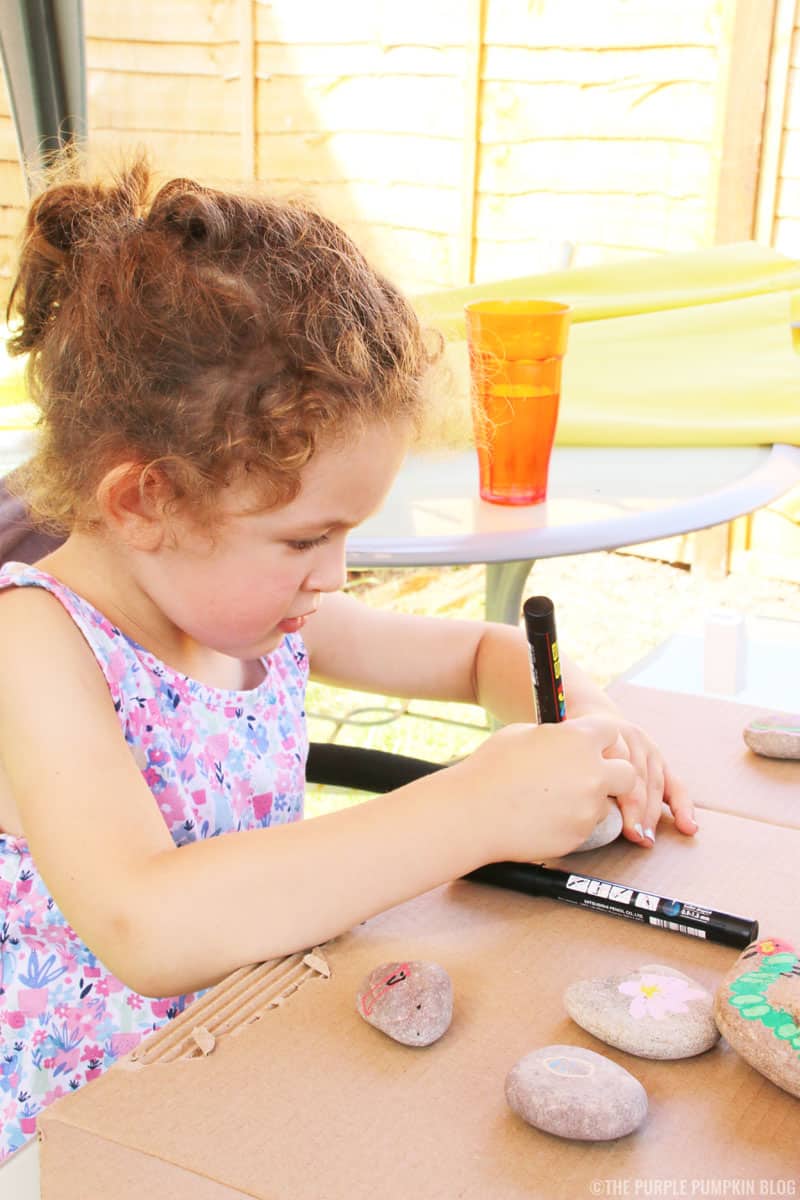
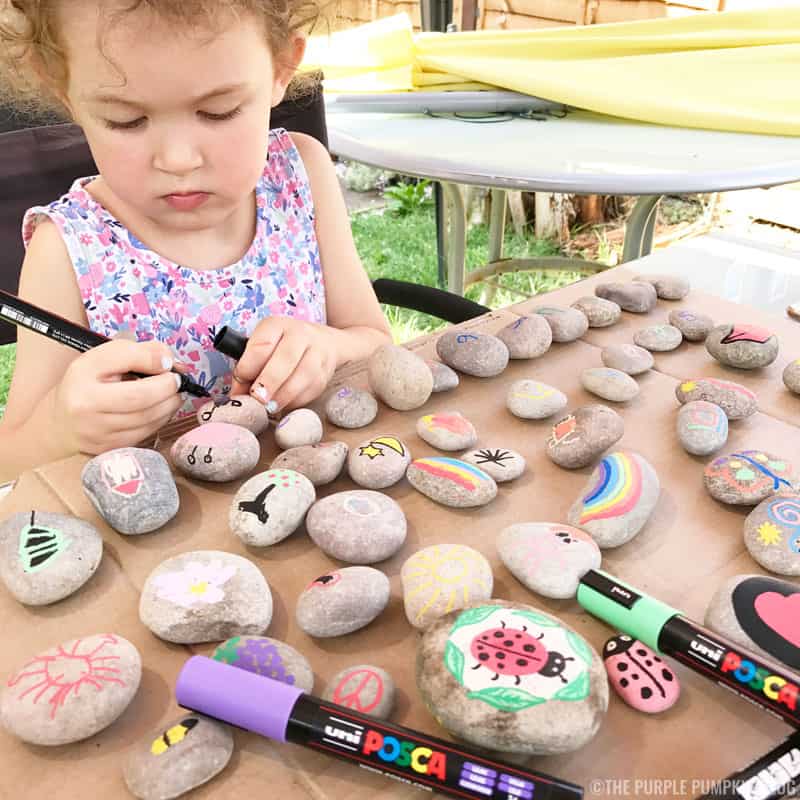
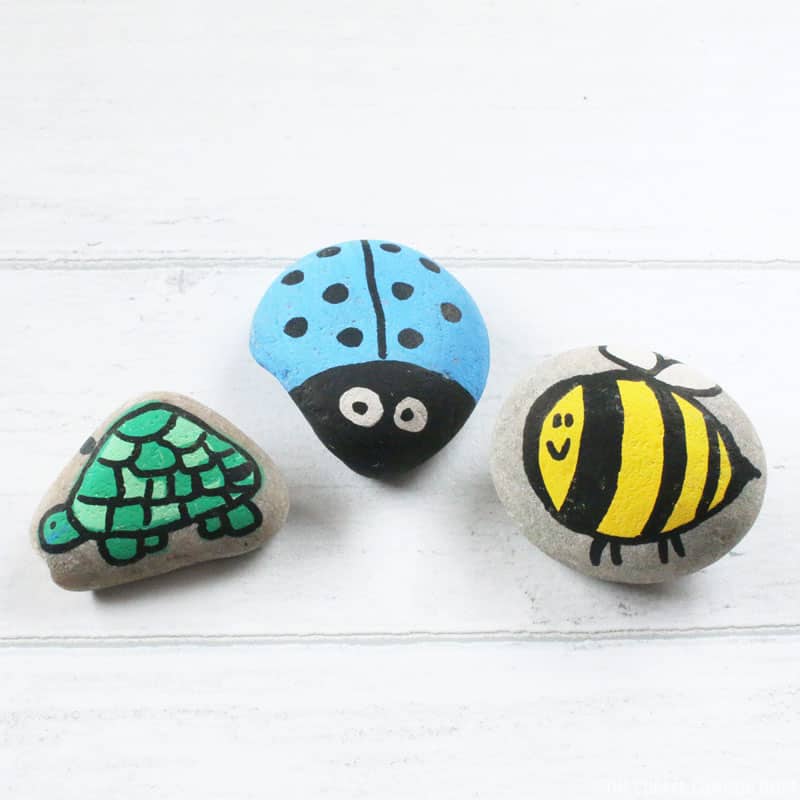
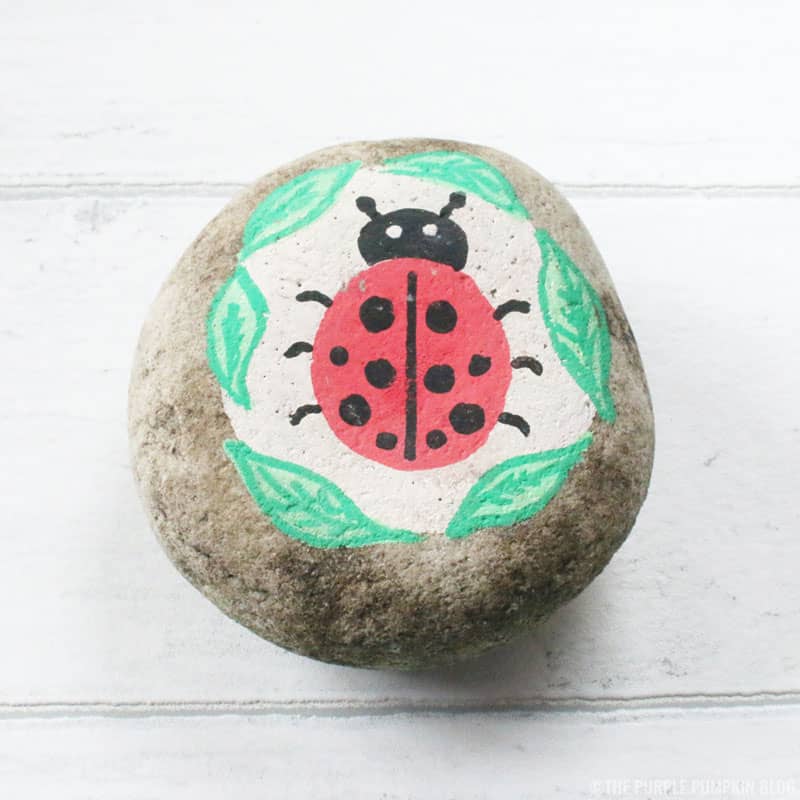
We drew lots of different things onto the stones – bugs, sea creatures, flowers, fruits, vegetables, trees and patterns. As we were decorating, Sephy asked me what we could do with the stones when we were finished – I suggested we could use them to decorate the garden – it wasn’t until later that evening that I came up with the story stones idea!

TIPS
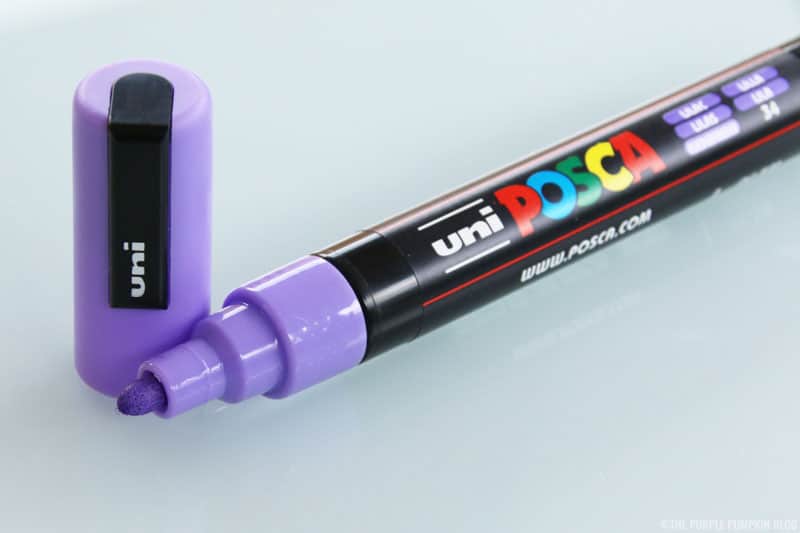
- You have to shake the pens to get the ink flowing when you first use them. I found you have to shake REALLY well! Do this before the kids use the pens so that they’re ready to go.
- Colours can be layered on top of each other, but you must wait for the layer to dry otherwise they become smudged – unless that’s the style you’re going for!
- If you do mix colours, make sure you remove the different colour from the pen nib by scribbling on a scrap piece of paper.
- Push the pen nib down a few tips to allow the ink to flow out more – handy for covering larger areas (although takes a bit longer to dry)
- If you make a mistake, wait for it to dry and draw over it it!
- Use light and dark of the same colour to add outlines or create depth.
- Use pictures from books, magazines, comics, and online for drawing inspiration.
- Story stones can be as simple or as intricate as your skills allow!
- If you’ve bought stones from a DIY shop, they will probably be a bit grubby or covered in sand. Wash them off and allow to dry before painting.
- To remove the ink/paint from skin, use warm soapy water. I also found that hand gel works too.
The Very Hungry Caterpillar Story Stones
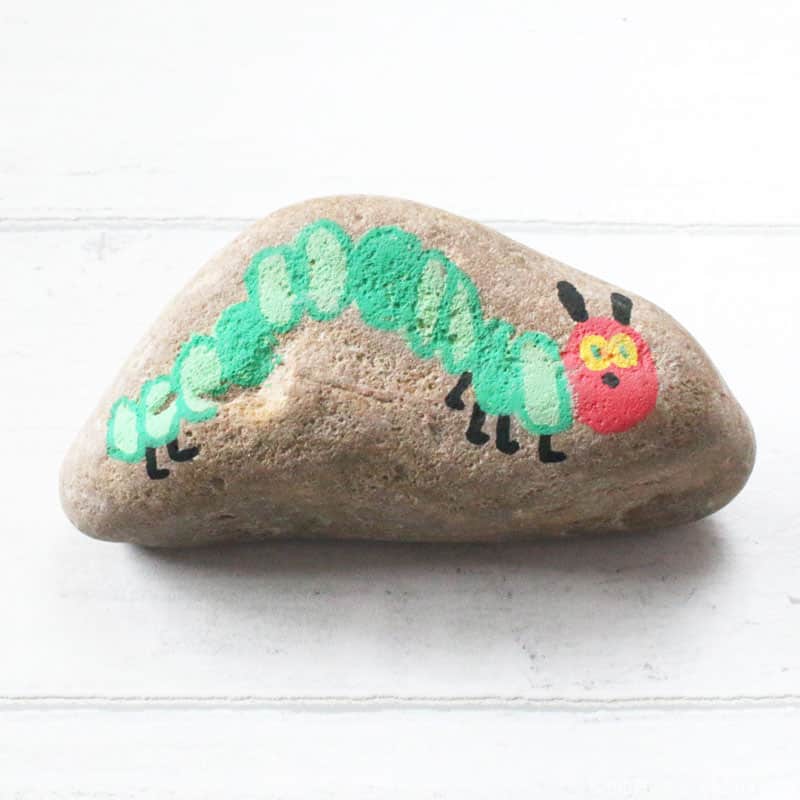
It was only later in the day, after she had gone home that the idea of story stones came to me! I had drawn a caterpillar onto a stone on Sephy’s request, and I knew that The Very Hungry Caterpillar was one of her favourites – it was also one of mine when I was a child! Instead of having the caterpillar on a single stone, I decided to colour lots of stones green, and use them to make a long caterpillar. I would then draw all the different foods that he eats onto individual stones.
In all you need 17 stones for the caterpillar: 1 for his head, and the rest for the body coloured in shades of green. You will need 25 more stones for all the different food that he ate: 1 apple, 2 pears, 3 plums, 4 strawberries, 5 oranges, 1 piece of chocolate cake, 1 ice-cream cone, 1 pickle, 1 slice of Swiss cheese, 1 slice of salami, 1 lollipop, 1 piece of cherry pie, 1 sausage, 1 cupcake, and 1 slice of watermelon!
I used online pictures as reference, and did have to get a bit creative with colours as I didn’t have all that matched exactly. But I think the finished story stones look awesome!
I found tiny pieces of slate in the gravel of our driveway to use as antennae for the caterpillar, but couldn’t find enough for the legs – so he is a legless caterpillar!
Since I have got several kilos of stones still to use, I can’t wait to make more story stones with my niece! She loves to tell stories, so I’m going to draw a bunch of random images so that she can pull them out of a bag and make them up as she goes along. I am also going to turn my hand to turning some favourite stories into story stones too! One of my favourite childhood stories is Fantastic Mr Fox by Roald Dahl – that’s certainly going to be a challenge as I’m not that good at drawing, but I’ll certainly give it a try!
I hope this has inspired you to make your own story stones! If you make some, I would love to see them! Share your creations on my Facebook page or on Instagram with the hashtag #thepurplepumpkinblog so I can find you!
Adrian Bold
August 3, 2017 @ 11:49 pm
My favourite childhood story was The Hobbit
Alisa Moore
August 3, 2017 @ 11:44 pm
Alice in Wonderland
Marie Rule
August 3, 2017 @ 11:22 pm
I used to love Hasel and Gretel.
Ed Hill
August 3, 2017 @ 11:06 pm
Any Asterix book
Scott Fallon
August 3, 2017 @ 11:03 pm
Charlie and the chocolate factory
Meryl
August 3, 2017 @ 11:02 pm
Peter Rabbit
Rachael C
August 3, 2017 @ 11:01 pm
It’s more of a book than a story, but Dogger is my favourite!
LEANNE DEMPSEY
August 3, 2017 @ 10:48 pm
Roald Dahl – The Twits
Monika Bascombe
August 3, 2017 @ 10:43 pm
Fantastic mr fox
Sarah prescott
August 3, 2017 @ 10:31 pm
I loved reading the famous five.
jacqui rushton
August 3, 2017 @ 10:22 pm
Alice in Wonderland
Michelle Pilling
August 3, 2017 @ 10:18 pm
Swallows and Amazons
Alison Macdonald
August 3, 2017 @ 10:17 pm
Loved Rumplestiltskin!
Diane Duggan
August 3, 2017 @ 10:15 pm
I loved Hansel and Gretel
Kirsty Woods
August 3, 2017 @ 10:06 pm
Topsy and Tim on the farm
Kathryn Booth
August 3, 2017 @ 10:04 pm
mine is the magic faraway tree by enid blyton
Rebecca roberts
August 3, 2017 @ 9:52 pm
Mine was railway children I use to love them
Kirsty Greer
August 3, 2017 @ 9:45 pm
I loved the naughty little sister books. And my girls do too now x
Sheena Read
August 3, 2017 @ 9:43 pm
The Lion, The Witch and The Wardrobe
Kim W
August 3, 2017 @ 9:29 pm
I loved all the Enid Blyton books, the Famous Five – including Timmy the Dog. I thought it really great to have a dog that followed the children everywhere. Now I have a dog of my own, I know they do, but they also don’t do as they are told either!
sallyanne rose
August 3, 2017 @ 9:18 pm
Heidi
Fiona jk42
August 3, 2017 @ 8:49 pm
I loved the book “The little white horse” by Elizabeth Goudge. Unfortunately the film adaptation of is dreadful, I much prefer the characters as they appear in the drawings in the book to how they were represented on screen.
Gemma Cook
August 3, 2017 @ 8:34 pm
My most treasured book as a child was the giant book of fairy tales my uncle gifted me on my fifth birthday. And my favourite fairytale was: The Snow Queen.
Rebecca Hussey
August 3, 2017 @ 8:33 pm
I loved the mog the cat series. My favourite was Mog and the baby
daniel pol
August 3, 2017 @ 6:54 pm
Water ship down
Emma Choonage
August 3, 2017 @ 6:52 pm
James and the giant peach was always a favourite of mine.
Jessica Hutton
August 3, 2017 @ 6:29 pm
I loved Matilda xx
Rachael O'Brien
August 3, 2017 @ 5:49 pm
I loved books as a child and lucky that my three daughters did when younger . My 12 year old has inherited all my books now and my favourite was always ‘The Chimney Witches ‘ my two year old would love these stones stories ! Fab idea! Thanks for this chance x
Vicky Allum
August 3, 2017 @ 5:48 pm
I used to love the Elves and the Shoemaker!
Lin Martin
August 3, 2017 @ 4:03 pm
Wind in willows
Jo Hutchings
August 3, 2017 @ 3:30 pm
I like the story of Hansel and Gretal. I liked imagining what the edible house was like!
Lisl Hemmins
August 3, 2017 @ 3:24 pm
My favourite childhood story was The Borrowers
Jane Green
August 3, 2017 @ 3:08 pm
I loved Curtain Up by Noel Streatfied
sharon martin
August 3, 2017 @ 3:07 pm
The Velveteen Rabbit
Kara
August 3, 2017 @ 2:40 pm
Mine and my daughters favourite is the hunger catapillier x
Isis W
August 3, 2017 @ 2:34 pm
My fave is a novel called George Speaks by King-Smith
hayley cooper
August 3, 2017 @ 2:29 pm
The Jolly Postman I loved it so much it fell to pieces!!
Susan B
August 3, 2017 @ 2:23 pm
Little Red Riding Hood was compelling for me.
Rebecca Barnes
August 3, 2017 @ 1:46 pm
My favourite story was the Famous Five books by Enid Blyton! :)
Keith Hunt
August 3, 2017 @ 1:35 pm
The House on the Cliff
Hayley Todd
August 3, 2017 @ 12:17 pm
I used to love the Rudyard Kipling’s ‘Just So’ Stories when I was a little girl.
Miss Tracy Hanson
August 3, 2017 @ 11:53 am
Used to love Enid Blyton – started with the Faraway Tree and then graduated onto Famous Five etc. Oh and a book called A Horse Called September when I was bit older.
Nick Q
August 3, 2017 @ 11:28 am
Treasure Island
Stuart Dunlop
August 3, 2017 @ 11:13 am
I can always remember when Mum was was holding a very important dinner for her friends, and she asked me to help with making the custard. She asked me to weigh out and add the sugar.
But when dessert came, and the custard was served over the pudding, the guests found out that I used salt instead of sugar!!
Charlotte Boyle
August 3, 2017 @ 11:05 am
Alice in wonderland
Robert Trees
August 3, 2017 @ 11:02 am
Little Red Riding Hood
Katie Mcginley
August 3, 2017 @ 10:35 am
Pippi longstocking
hannah igoe
August 3, 2017 @ 10:25 am
I loved the magicians nephew
Lucy Chester
August 3, 2017 @ 10:11 am
I used to love Charlie and the Chocolate Factory and used to wish I could go into the garden and eat as much chocolate and sweets as I could.
Jayne K
August 3, 2017 @ 10:08 am
Puck’s Peculiar Pet Shop
Mary H
August 3, 2017 @ 9:54 am
I adored James and the Giant Peach. Or anything by Roald Dahl
pauline black
August 3, 2017 @ 9:29 am
I loved the Enid Blyton faraway tree books
Rebecca Lis
August 3, 2017 @ 9:24 am
THE GRUFFALO
Julie Camm
August 3, 2017 @ 9:23 am
Not one story in particular but I loved the Mallory Towers books by Enid Blyton
Lucy D
August 3, 2017 @ 9:13 am
The Owl who was afraid of the dark
Wes M
August 3, 2017 @ 8:13 am
Stig of the Dump
Samantha
August 3, 2017 @ 8:06 am
The famous five
Carly Belsey
August 3, 2017 @ 7:13 am
I used to love the Magic Faraway Tree. These story stones are such a fab idea, thank you, I will try them with my daughter
Mandi Davison
August 3, 2017 @ 6:53 am
The faraway tree by Enid Blyton..all of her books were fab and i read them lots!!
jessica
August 3, 2017 @ 6:29 am
hmm well I wasn’t told stories as a child and was reading mills and boon at 6 but if I had to pick a child’s story that I like today it would have to be Mulan even though it’s a Disney movie I like how she’s not a damsel in distress and can kick butt
Leanne Hansell
August 3, 2017 @ 5:14 am
My favourite children’s story is The Magic Faraway Tree
Kat Lucas
August 3, 2017 @ 1:51 am
Horton Hatches an Egg
Sophie Carter
August 3, 2017 @ 1:24 am
Goldilocks and the three bears
Kate Davies
August 3, 2017 @ 12:56 am
I loved hairy mclary.
Robyn Clarke
August 3, 2017 @ 12:52 am
Chicken Licken
Rebecca MacBain
August 3, 2017 @ 12:47 am
The famous five Enid Blyton! I used to read it moat days in my Wendy house.
paula cheadle
August 3, 2017 @ 12:28 am
I loved Tom Thumb story the best
Jo Hutchinson
August 3, 2017 @ 12:16 am
The Very Hungry Caterpillar
ellie spider
August 3, 2017 @ 12:14 am
I love the famous five books – I anted to own my own Island and go on adventures
Caroline Signey
August 2, 2017 @ 11:10 pm
Little red riding hood
Dawn Hull
August 2, 2017 @ 10:56 pm
My favourite childhood story has to be Matilda.
Jade Wimsey
August 2, 2017 @ 10:42 pm
The Harry Potter books were my favourite when I was growing up
amanda walsh
August 2, 2017 @ 9:58 pm
The Magic Far Away Tree by Enid Blyton
DENISE WILDEN
August 2, 2017 @ 9:43 pm
Chimney Corner Stories by Enid Blyton
angela sandhu
August 2, 2017 @ 9:30 pm
I love sleeping beauty
Carol Phile
August 2, 2017 @ 9:21 pm
Not Now, Bernard
Ellie Wood
August 2, 2017 @ 9:03 pm
James and the giant peach, I feel like it kickstarted my love of peaches
Emma Davison
August 2, 2017 @ 8:42 pm
Hungry caterpillar
AnnaH
August 2, 2017 @ 8:40 pm
The Tiger Who Came To Tea
Simone Griffin
August 2, 2017 @ 8:40 pm
It has to be the hungry caterpillar x
zoe brown
August 2, 2017 @ 8:33 pm
princess and the pea
chloe brill
August 2, 2017 @ 8:22 pm
roald dahl boy tales
janine atkin
August 2, 2017 @ 7:56 pm
i loved the lion the witch and the wardrobe
Michelle Cheeseman
August 2, 2017 @ 7:45 pm
Alice In Wonderland was my favourite!
Winnie Fox
August 2, 2017 @ 7:25 pm
I loved the ugly duckling as a child – and still do
Sarah Wilson
August 2, 2017 @ 7:13 pm
The Lion, The Witch and The Wardrobe
Kel
August 2, 2017 @ 6:41 pm
We’re going on a bear hunt was my fave childhood story and now I read it to my kids ^_^
nicky pearce
August 2, 2017 @ 6:35 pm
three little pigs
Sarah Fielding
August 2, 2017 @ 6:33 pm
Alice in wonderland for sure!
Elisa Trueman
August 2, 2017 @ 6:29 pm
Black Beauty was my all time favourite, my mum used to read it to me at bedtime before I was old enough to decipher it for myself. I still love the story now x
Cerys John
August 2, 2017 @ 6:13 pm
Sleeping Beauty :)
Katy Malkin
August 2, 2017 @ 5:11 pm
I always loved Watership Down but my little girl does love the very hungry caterpillar.
Anne Plumb
August 2, 2017 @ 5:07 pm
Goldilocks and the three bears
dana
August 2, 2017 @ 4:19 pm
Cinderella
Deborah Bird
August 2, 2017 @ 4:03 pm
The Magic Faraway Tree :)
Nuala R
August 2, 2017 @ 3:56 pm
Hansel and Grettal
Louise Burgess
August 2, 2017 @ 3:56 pm
Amazing idea love to do a lion king one
Tracy
August 2, 2017 @ 3:53 pm
Room on the Broom and Superworm are my favourites to read to my children!
Amy Pest
August 2, 2017 @ 3:34 pm
matilda
Laura Muir
August 2, 2017 @ 3:19 pm
I really remember the Beatrix Potter books … Miss Tiggywinkle was my favourite!
Joanna Orr
August 2, 2017 @ 3:16 pm
I used to read and re-read The Lion, the Witch & the Wardrobe!
Anthea Holloway
August 2, 2017 @ 2:47 pm
Mrs Frisby and the Rats of NIMH
JULIE WARD
August 2, 2017 @ 2:12 pm
The three little pigs
Karen Lloyd
August 2, 2017 @ 2:01 pm
Little Red Riding Hood is my favourite story from my childhood.
natalee gosiewski
August 2, 2017 @ 1:55 pm
Hairy Mcclary from donaldson dairy
Rich Tyler
August 2, 2017 @ 1:48 pm
The Twits!
Dale Dow
August 2, 2017 @ 1:33 pm
The Witches has to be my favourite x
Debi Newman
August 2, 2017 @ 1:16 pm
The Faraway Tree x
Jo Godfray
August 2, 2017 @ 1:12 pm
Gelert!! Used to make me cry every time!! So sad. I really want to get a Saluki. Lovely dogs!!
Caroline Smith
August 2, 2017 @ 12:54 pm
Mog the Cat
Kat Allinson
August 2, 2017 @ 11:48 am
I loved the Winnie the Pooh stories
carol boffey
August 2, 2017 @ 11:35 am
THE BFG
Rebecca Powell
August 2, 2017 @ 11:11 am
I loved the Alfie books
Samantha Swain
August 2, 2017 @ 10:54 am
I loved Danny Champion of the World by Roald Dahl
Jenny Dimmock
August 2, 2017 @ 10:40 am
The Twits by Roald Dahl.. I found it hilarious!
Erica Price
August 2, 2017 @ 9:30 am
Five on Treasure Island
Vicki A Smith
August 2, 2017 @ 9:04 am
Charlie & The Chocolate Factory
elaine stokes
August 2, 2017 @ 9:03 am
I loved the tiger that came to tea
Tim Millington
August 2, 2017 @ 8:54 am
Roald Dahl – The Twits
Lucy Carter
August 2, 2017 @ 8:43 am
Dear Zoo
Allan Wilson
August 2, 2017 @ 7:15 am
The Secret Seven books
Sarah Parker
August 2, 2017 @ 7:12 am
green eggs and ham
Joanna Kasznicki
August 2, 2017 @ 1:44 am
Tha magic faraway tree…loved moonface
Monica Gilbert
August 1, 2017 @ 11:43 pm
The Tar Baby. It’s an Uncle Remus story that was part of a book of the stories covered in Song of the South.
Hayley Gibson
August 1, 2017 @ 11:36 pm
The Witches (Roald Dahl)
claire little
August 1, 2017 @ 11:20 pm
charlie and the chocolate factory
Laura Asplin
August 1, 2017 @ 9:30 pm
The Very Hungry Caterpillar
Sheri Darby
August 1, 2017 @ 9:17 pm
The Famous Five books
Sheri Darby
August 1, 2017 @ 9:17 pm
The Famous 5 stories
Samantha Atherton
August 1, 2017 @ 8:32 pm
My favorite stories were the Mog books when I was a child.
Ellen Stafford
August 1, 2017 @ 8:32 pm
Goldilocks and the three bears.
Samantha Atherton
August 1, 2017 @ 8:29 pm
I liked all the Mog books when I was a child.
Pauline Burroughs
August 1, 2017 @ 8:14 pm
The Magic Faraway Tree
Laura Chapman
August 1, 2017 @ 7:04 pm
The Jolly Postman
Danielle Pooley
August 1, 2017 @ 4:09 pm
Charlie and the chocolate factory was my favourite book
ADEINNE TONNER
August 1, 2017 @ 2:58 pm
For me it has to be the twits by Roald Dhal i loved that book as a child.
Sarah Lee
August 1, 2017 @ 12:24 pm
Enid Blyton’s The Secret Island
greig spencer
August 1, 2017 @ 10:38 am
JACK AND THE BEAnstaLK
Celia West
August 1, 2017 @ 8:26 am
I used to love the Mary Mouse stories by Enid Blyton
Iris Waldburger
August 1, 2017 @ 7:48 am
I used to love any Enid Blyton books especially the Famous Five stories
Lydia Graham
August 1, 2017 @ 12:48 am
The magic Faraway Tree by Enid Blyton
Emma Salter
August 1, 2017 @ 12:12 am
Henny Penny – the one where the sky falls in.
leanne weir
July 31, 2017 @ 11:31 pm
Peter pan
HAYLEY TURNER
July 31, 2017 @ 10:55 pm
The elves and the shoemaker
Christine Caple
July 31, 2017 @ 10:27 pm
The Adventures of the Little Wooden Horse
MM
July 31, 2017 @ 9:35 pm
I loved “Treasure Island” by Robert Louis Stevenson
Anni Large
July 31, 2017 @ 9:16 pm
I loved Matilda. :)
Claire Long
July 31, 2017 @ 8:10 pm
The Jolly Postman! I have the book for my little nephew now.
Eleanor P
July 31, 2017 @ 8:03 pm
Mine was The Twits by Roald Dahl!
DEBBIE W
July 31, 2017 @ 6:54 pm
I loved Peter Pan, especially when I was old enough to read it myself.
Stephen Little
July 31, 2017 @ 4:01 pm
Treasure Island
Rebecca Howells (@PeanutHog)
July 31, 2017 @ 3:09 pm
Matilda my Roald Dahl and Noddy
Rhiannon Hodge
July 31, 2017 @ 3:01 pm
The Twits
Emily Hutchinson
July 31, 2017 @ 1:12 pm
Teeny Tiny and the Witch Woman
Sharon williams
July 31, 2017 @ 8:30 am
I loved the Faraway Tree as a child
Kevin Johnson
July 31, 2017 @ 1:54 am
The Incredible Journey (the book which the film Homeward Bound was based upon).
Keshia Esgate
July 30, 2017 @ 7:43 pm
Winnie the Pooh
Sheila Sloan
July 30, 2017 @ 7:27 pm
Heidi
Hannah Lord
July 30, 2017 @ 6:15 pm
I loved the Elmer the Elephant stories
Kelly Hirst
July 30, 2017 @ 4:17 pm
The magic faraway tree
Rachell Lynch
July 30, 2017 @ 3:59 pm
anything by Dr Seuss
Joanna Ford
July 30, 2017 @ 1:03 pm
The Tiger who came to Tea by Judith Kerr
Amanda Jayne Davis
July 30, 2017 @ 10:27 am
The Iron Man
rebecca beesley
July 29, 2017 @ 11:34 pm
what a great craft activity! My current fave children’s book is oliver jeffers ‘the heart and the bottle’ but as a kid i loved little red riding hood.
carole nott
July 29, 2017 @ 10:29 pm
loved reading The Borrowers when i was young and wishing i could join them
Lisa Wilkinson
July 29, 2017 @ 10:13 pm
The Jolly Postman
Helen Grayson
July 29, 2017 @ 9:27 pm
The very hungry caterpillar! I loved seeing what he ate!
Tammy Artherton
July 29, 2017 @ 8:34 pm
the magic faraway tree
Ruth Harwood
July 29, 2017 @ 12:34 pm
we always loved it when our mum read the hobbit to us xx
Victoria Prince
July 29, 2017 @ 11:10 am
Has to be The Tiger Who Came To Tea for me :)
Sarah Leese
July 29, 2017 @ 8:07 am
I loooove the magic faraway tree, and also the terrible plop
MARK HOPKINS
July 28, 2017 @ 11:03 pm
The BFG
Rai
July 28, 2017 @ 10:08 pm
Finn family moomintroll – I used to totally lose myself in it. Thanks
EJ Dunn
July 28, 2017 @ 7:24 pm
I loved Quacky, Quack, Quack
terri jenner
July 28, 2017 @ 5:36 pm
always liked anything by enid Blyton myself nothing like the adventure of the famous five or secret seven
Natalie Turner
July 28, 2017 @ 1:00 pm
Beauty and the Beast
Natalie Crossan
July 27, 2017 @ 11:36 pm
Danny the champion of the world
Christina Palmer
July 27, 2017 @ 11:26 pm
Tom Browns Schooldays
MichelleD
July 27, 2017 @ 8:59 pm
The magic faraway tree
Kat C
July 27, 2017 @ 7:45 pm
The Lion, The Witch and The Wardrobe
Nic S
July 27, 2017 @ 5:58 pm
I loved the The Little Red Hen, the times I used to get my Dad to read that to me!!
jade bremner
July 27, 2017 @ 5:55 pm
I always loved the story Peace at last and I bought the book to read to my son and now my daughter. They don’t seem to love it as much as I did but I guess we all need our own favourite
Jessica Powell
July 27, 2017 @ 4:12 pm
My favourite was The Borrowers :)
Jules Eley
July 27, 2017 @ 2:24 pm
rumpelstiltskin was my favourite.
Jo Carroll
July 27, 2017 @ 1:59 pm
Alice in Wonderland was just so magical and full of imagination.
katrina walsh
July 27, 2017 @ 12:03 am
hansel and gretel
Karen
July 26, 2017 @ 11:42 pm
My favorite is dr sues. Green eggs and ham. Loved it.
Shyloh
July 26, 2017 @ 10:53 pm
My favorite childhood story is Stephanie’s ponytail :)
Alison Johnson
July 26, 2017 @ 10:03 pm
The Happy Prince
Zoey Harris
July 26, 2017 @ 10:01 pm
The magic faraway tree
Ailsa
July 26, 2017 @ 8:09 pm
The tiger who came to tea!
Emma Wayt
July 26, 2017 @ 7:55 pm
Burglar Bill. I was given the book my big sister on my 5th birthday and I still have it and read it to my children – 37 years later!!
Heather Haigh
July 26, 2017 @ 7:50 pm
Cinderella.
claire griffiths
July 26, 2017 @ 6:16 pm
the gruffalo
Lucy McCormick
July 26, 2017 @ 4:39 pm
Goldilocks and the 3 bears :)
adele knight
July 26, 2017 @ 4:07 pm
Cinderella, my Dad would read it to me and always changed her name to mine
Samantha Bolter
July 26, 2017 @ 3:34 pm
The Cat in the Hat :)
Aqsa
July 26, 2017 @ 4:17 pm
The Hungry caterpillar ! I loved how much he could eat!
kayleigh kimberley
July 26, 2017 @ 3:25 pm
my favourite story as a child was the mog series but as a adult who works with children love to read the Gruffalo to them
Rachel Norton
July 26, 2017 @ 3:17 pm
Cinderella
Lorna Ledger
July 26, 2017 @ 1:37 pm
3 little Pigs – love this Blog post x
Karen
July 26, 2017 @ 1:10 pm
Cinderella
Jennifer
July 26, 2017 @ 11:10 am
Alice in Wonderland :)
Laura Jeffs
July 26, 2017 @ 9:08 am
It’s got to be Rapunzel !!
Emma Edge
July 26, 2017 @ 8:01 am
Zog
Victoria Hemmings
July 25, 2017 @ 9:54 pm
i liked Red Ridding Hood
Heather Hibbert
July 25, 2017 @ 9:26 pm
Matilda
Charlotte A
July 25, 2017 @ 8:32 pm
George’s Marvellous Medicine
Leah
July 25, 2017 @ 5:51 pm
The Chronicles of Narnia!
Jemma Dwyer
July 25, 2017 @ 11:45 am
the never ending story x
helenlp
July 25, 2017 @ 8:43 am
Peter Pan
Emma Nixon
July 24, 2017 @ 8:44 pm
The tales of Robin Hood
ELZBIETA ZNYK
July 24, 2017 @ 5:27 pm
3 Little Pigs.
amy bondoc
July 24, 2017 @ 4:55 pm
i always loved enid blyton books, especially mr meddle mischeif !
Pauline Hill
July 24, 2017 @ 3:36 pm
Alice in Wonderland
Kerry Metcalfe
July 24, 2017 @ 2:30 pm
Roald Dahl,’s The Twits. No contest! (and I still love it now, aged 36)
Suzanne Jackson
July 24, 2017 @ 11:01 am
hansel and gretel
Diana Maxwell
July 24, 2017 @ 9:58 am
I had a children’s version of the Greek myths which enchanted me.
Kristy Brown
July 24, 2017 @ 8:38 am
The Little Red Hen
Heather Bowie
July 24, 2017 @ 7:45 am
3 little pigs
Lorraine Tinsley
July 23, 2017 @ 11:14 pm
Peace At Last
K KAUR
July 23, 2017 @ 10:53 pm
Heidi
Emily Clark
July 23, 2017 @ 10:39 pm
I loved The Fish who could Wish!
Helen Tovell
July 23, 2017 @ 10:37 pm
The very lazy lady bird
Sarah N
July 23, 2017 @ 9:21 pm
Alice in Wonderland
Tracy Hanley
July 23, 2017 @ 8:45 pm
Puss in Boots was my fav
Penny H
July 23, 2017 @ 8:31 pm
Cinderella was my favourite story. These pens are so cool, love your story stones!
ASHLEIGH RYAN
July 23, 2017 @ 8:20 pm
The Secret Garden
Kate Toner
July 23, 2017 @ 8:15 pm
The Lion, the Witch and the Wardrobe
Kath
July 23, 2017 @ 7:26 pm
I loved all of Enid Blytons books. My favourites were The Faraway Tree and The Wishing Chair
Christine Dodd
July 23, 2017 @ 7:12 pm
I used to love The Princess and the Pea
Tammy Tudor
July 23, 2017 @ 7:03 pm
The Little Mermaid
Jo Jones
July 23, 2017 @ 6:55 pm
The Secret Garden
Lucy
July 23, 2017 @ 6:01 pm
Matilda!
maureen findley
July 23, 2017 @ 6:00 pm
charlie and the chocolate factory
Rebecca
July 23, 2017 @ 5:37 pm
The Owl Who Was Afraid of The Dark – absolutely loved that book!
Katharine Balyuzi
July 23, 2017 @ 5:30 pm
The Tiger who came to tea
Brett Pereira
July 23, 2017 @ 5:28 pm
Little Red Riding Hood
Sidrah Ahmed
July 23, 2017 @ 5:23 pm
The very busy spider
Lorna Nicoll
July 23, 2017 @ 5:17 pm
Danny, Champion of the World
Kelly Glen
July 23, 2017 @ 5:15 pm
I used to love the Alfie books by Shirley Hughes.
Yvonne
July 23, 2017 @ 5:12 pm
Little Women is my favourite story
Mariel Pereira
July 23, 2017 @ 5:03 pm
Hansel and Gretel
darren hay
July 23, 2017 @ 5:03 pm
Danny, the Champion of the World. I read it at school and i still remember it.
CAROL PATRICK
July 23, 2017 @ 4:57 pm
Alice in Wonderland
Zoe C
July 23, 2017 @ 4:37 pm
The Magic Porridge Pot
Vicki D
July 23, 2017 @ 4:36 pm
I loved the jungle book as a child….I think it was because I was a bit of a wild child lol
Karen R
July 23, 2017 @ 4:21 pm
I loved Enid Blyton’s Wishing Chair stories :)
CAROLYN HEYWORTH
July 23, 2017 @ 4:13 pm
Loved Folk of the faraway tree by Enid Blyton. Happy Days !
stuart hargreaves
July 23, 2017 @ 4:06 pm
alice in wonderland – its my non birthday today
Fiona
July 23, 2017 @ 3:52 pm
I loved Peter Rabbit
Louisa
July 23, 2017 @ 2:44 pm
Alice in wonderland
Chris Andrews
July 23, 2017 @ 12:50 pm
What is your favourite childhood story? . . . . the ones my dad used to make up for me at bedtime, l thought they were fantastic, l wish l had written them down as l can’t remember them now
Stevie
July 23, 2017 @ 10:59 am
I liked George’s Marvellous Medicine by Roald Dahl.
Maya Russell
July 23, 2017 @ 8:14 am
Cinderella was my favourite – I had the old Ladybird book & used to wonder at the dresses she wore.
Jane Willis
July 23, 2017 @ 5:18 am
The Lion, the Witch and the Wardrobe – I don’t think I could make story stones for that though!
Alix
July 23, 2017 @ 12:01 am
I loved the rainbow fish!
Naila M
July 22, 2017 @ 11:08 pm
My favourite childhood story is Charlie and the Chocolate factory by Roald Dahl :)
lynn neal
July 22, 2017 @ 11:06 pm
Little Red Riding Hood
Kate Fox-Pope
July 22, 2017 @ 9:03 pm
that one about the wolf who thinks he’s eaten the pigs (or goats?) but they’ve tricked him into eating stones
claire woods
July 22, 2017 @ 8:50 pm
The Magic Faraway Tree
Flo
July 22, 2017 @ 8:23 pm
Gotta be Roald Dahl’s The BFG!
Tracy Newton
July 22, 2017 @ 6:58 pm
I love James and The Giant Peach
rebecca h
July 22, 2017 @ 6:14 pm
Happy Birthday Moon! I love that book so much
Natasha Mairs
July 22, 2017 @ 6:09 pm
My favourite book as a kid was The Jolly Postman, I used to love open the cute little letters
Isabel O
July 22, 2017 @ 12:39 pm
When my sister and I were little my dad used to read to us from the original Winnie The Pooh and House at Pooh Corner books, they are really treasured memories of mine.
Amie
July 22, 2017 @ 11:32 am
Cinderella or Beauty & the Beast :)
jennifer bolognesi
July 22, 2017 @ 8:41 am
The faraway Tree
Jamie Edwards
July 21, 2017 @ 10:05 pm
It was ‘Dont’ forget to write!’ – Such a great book, I read it to my little ones now! :)
Laura Pritchard
July 21, 2017 @ 9:06 pm
Rumpelstiltskin
Emilie Curry
July 21, 2017 @ 8:47 pm
The Magic Faraway Tree – Enid Blyton
Alexandra oliver
July 21, 2017 @ 7:53 pm
Georges Marvellous Medicine- and its still one of my faves!
Nicola O'Brien
July 21, 2017 @ 7:39 pm
The Magic Faraway Tree
Kay Sherman
July 21, 2017 @ 7:02 pm
The frog prince and now my children love it too
Gillian Holmes
July 21, 2017 @ 6:18 pm
‘The lion, the witch, and the wardrobe’ wasn’t too happy later to learn it was religious brainwashing, but hey ho it didn’t work.
Michelle Ordever
July 21, 2017 @ 6:50 pm
Woah, I did not know that!
Andrea A
July 21, 2017 @ 4:18 pm
My favourite childhood story was Little Red Riding Hood.
Ana De- Jesus
July 21, 2017 @ 2:00 pm
Aw how adorable are these story stones. This is my first time hearing of the story stone concept but I really like the sound of them! x
Kim
July 21, 2017 @ 12:49 pm
I love these! Funnily my favourite book as a child was The Very Hungry Caterpillar and I still own a copy (and one in Polish language from an ex boyfriend).
Michelle Ordever
July 21, 2017 @ 1:04 pm
It is such a great book! I remember doing a project in school when I was about 7 (I’m 40 now) and we had made all the foods the caterpillar ate and hung them round the classroom!
iain maciver
July 21, 2017 @ 12:39 pm
jack and the beanstalk
Alison
July 21, 2017 @ 12:21 pm
Charlie and the chocolate factory by Roald Dahl
LISA Dolatowski
July 21, 2017 @ 11:57 am
I loved The Worst Witch!
Michelle Ordever
July 21, 2017 @ 1:04 pm
Great book! Another of my faves!
Tony Metcalfe
July 21, 2017 @ 11:56 am
The Just William books by Richmal Crompton books.
Nigel Soulsby
July 21, 2017 @ 11:54 am
The Emperor’s new clothes was mine,as were many of Hans Christians Andersens tales
Michelle Ordever
July 21, 2017 @ 1:04 pm
You can’t beat a classic fairy tale!
Margaret gallagher
July 21, 2017 @ 10:42 am
Family holidays!!
All 11 of us JAM PACKED into our estate car and travelling to Ireland by road and ferry
Was great -all we has was pencils and paper and we never got bored
Harneet Farmahan
July 21, 2017 @ 9:31 am
Snow white and the seven dwarfs….. For some reason i would call them 7 duffers, i cudnt say dwarfs ….but i was really fond of them, especially sneezy!
Jodie A Green
July 21, 2017 @ 9:21 am
my favourites were the peter rabbit books
Kimberley Ryan
July 21, 2017 @ 9:17 am
my favourite has always been The Hobbit, it is now one of my daughters favourites too
Sheena Batey
July 21, 2017 @ 8:20 am
Beauty and the Beast was my favourite story when I was a child.
Solange
July 21, 2017 @ 8:11 am
Alice in Wonderland.
tina glover
July 21, 2017 @ 8:05 am
I loved James and the giant peach such a fab book – but so are all Roald Dahls books! Fab bundle i love Posca pens and use them for writing on wood when im being creative x
Kat
July 21, 2017 @ 7:48 am
Ace Dragon Ltd.
I just googled and its still available!
Hayley Atkins
July 21, 2017 @ 1:21 am
I loved Cinderella and the story came to life in a “pop up ” book which I still have.( I am 50 now! )
melanie stirling
July 20, 2017 @ 11:26 pm
The Secret Garden.
fiona waterworth
July 20, 2017 @ 10:39 pm
pinocchio
Sarah Mackay
July 20, 2017 @ 10:38 pm
My favourite childhood memory is my parents Hogmanay parties when I was a kid.
Kayleigh Watkins
July 20, 2017 @ 10:22 pm
I loves Hansel and Gretel when I was younger, and Ronald Dahl’s James and the giant peach as I got a bit older xxx
Tee Simpson
July 20, 2017 @ 8:47 pm
It was little red riding hood
Rebecca Brown
July 20, 2017 @ 8:31 pm
The fish who could wish!
Graham Ross
July 20, 2017 @ 8:08 pm
I used to love the ladybird books when I was a small child
laura stewart
July 20, 2017 @ 8:07 pm
dad taking us campping to devon x
Tracey Peach
July 20, 2017 @ 7:48 pm
My favourite childhood story was Cinderella :) x
Susan Smith
July 20, 2017 @ 7:47 pm
Peter Pan
Karen Barrett
July 20, 2017 @ 7:43 pm
The Railway Children
Michelle Ferguson
July 20, 2017 @ 7:34 pm
I loved the emperors new clothes
clair downham
July 20, 2017 @ 7:06 pm
the elves and the shoemaker
Hayley F
July 20, 2017 @ 7:02 pm
Matilda x
Helen Humphries
July 20, 2017 @ 6:56 pm
Paddington – still have warm fuzzy memories about the bear from darkest Peru!
Ashleigh Allan
July 20, 2017 @ 6:41 pm
The magic porridge pot
Kim Neville
July 20, 2017 @ 6:31 pm
I liked the three little pigs
Kim Styles
July 20, 2017 @ 6:11 pm
The Adventures of Sam Pig- My teacher usedtoread it to us at the end of each day at infant school -I loved it
pete c
July 20, 2017 @ 5:11 pm
Rumpelstiltskin
Angela Kelly
July 20, 2017 @ 5:10 pm
Mine was the Tale of Georgie Grub.
Erin Thomas
July 20, 2017 @ 5:01 pm
Cinderella
abigail edkins
July 20, 2017 @ 5:01 pm
the wishing powder
suzanne drummond
July 20, 2017 @ 5:00 pm
peter rabbit
Amberly Hunt
July 20, 2017 @ 5:00 pm
My favourite book that i used to read as a child was called Herb the Vegetarian Dragon, and i read it to my little brother and sister 10 years later!
Katerina Economides
July 20, 2017 @ 4:45 pm
The poor Shoemaker and the elves that would come and make shoes in the night.
Sue McCarthy
July 20, 2017 @ 4:31 pm
I used to love the Beatrix Potter stories
Linda
July 20, 2017 @ 3:52 pm
I loved Anne of Green Gables. I still would like to visit Prince Edward Island. Maybe one day…..
Michaela Hannah
July 20, 2017 @ 3:49 pm
I loved Danny the champion of the world
jo liddement
July 20, 2017 @ 3:33 pm
I loved the Paddington Bear books when i was a child.
Angela Treadway
July 20, 2017 @ 3:16 pm
Snow white x
Hannah ingham
July 20, 2017 @ 2:53 pm
A little Princess, a lovely classic that I still enjoy now!
Lorraine B
July 20, 2017 @ 2:50 pm
I really used to love Brer Rabbit
Rob Hutchinson
July 20, 2017 @ 2:49 pm
My favourite is The Magic Faraway Tree, by Enid Blyton
rose w
July 20, 2017 @ 2:23 pm
my fave was mary poppins
Lorraine Kirk
July 20, 2017 @ 2:10 pm
Mine was ‘The Elves and the Shoemaker’
Tracy Nixon
July 20, 2017 @ 2:06 pm
I loved The Little Red Hen!
Susan lloyd
July 20, 2017 @ 1:13 pm
I love sleeping beauty x
Catherine McAlinden
July 20, 2017 @ 12:46 pm
Mine was George’s Marvellous Medicine
Michelle Ordever
July 20, 2017 @ 1:01 pm
Great book! I remember Rik Mayall reading that on the BBC (was it Jackanory?) I loved most of Roald Dahl’s books :D
Leila Benhamida
July 20, 2017 @ 11:54 am
The little prince by St Exupery. I went to school in France and that’s the book I enjoyed most.