Making Fabric Bunting For The Diamond Jubilee
Home » CREATE » Crafts » Sewing Crafts »The final ‘Make It’ Monday before the Diamond Jubilee this coming weekend. I’ve actually not quite finished this, so this post will be added to later in the week! I do have a few more crafty things planned for the Jubilee, and will blog about them in due course, so please stay tuned!
So what have I been making this week? Fabric bunting! I’m so excited to see it all come together!

I decided to stick to vintage looking fabrics so that I could re-use my bunting on other occasions like summer parties or tea parties, rather than using Union Jack or red, white and blue fabrics and feeling limited as to when I could use them. I bought my fabric from Ikea (who knew that they sold fabric?!) and spent maybe £12.

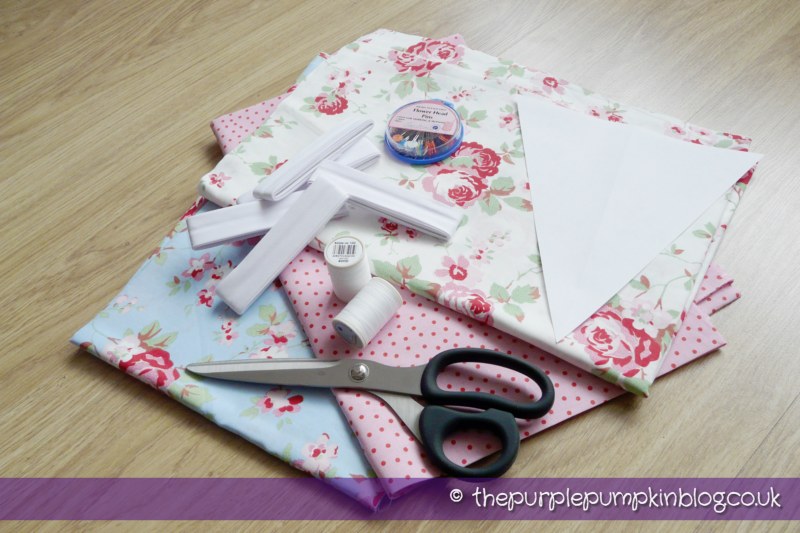
I made a triangle template from an A4 piece of paper, by folding it in half, unfolding it, and drawing a line from the two top corners down to the centre point. I took about an inch or so from the top to make a slightly stubbier triangle.
I also bought some bias tape, which is what I’ll be attaching the triangles of fabric to, to hang the bunting, and some white cotton. I also bought some pins to hold things in place and some fabric scissors as well to give the material a good clean cut.
I bought a sewing machine about a year ago now, and with the best of intentions to make *something…anything* I hadn’t gotten around to using it! But with the celebration of the Queen’s 60th year on the throne, I thought it was an ideal time to give it a go….I’ve not used a sewing machine since textiles class in school – some 20 years or so ago, so my skills were rusty to say the least!
But, eventually I managed to figure out how to wind my bobbin on, and sew with an even tension :D I’m glad I saved the scraps of fabric to practice on!
First things first – I needed to cut out all my triangles. I pinned my template in place and carefully cut around.

I made sure that the ‘right sides’ were facing each other, and continued cutting. It was a looong job, let me tell you, and towards the end I was doubling up fabric and all sorts, just so I could finish! In the end I got around 23 – 25 double triangles from each piece of fabric. Maybe there is an easier way of doing things, but since I was going into this blind and making it up as I went a long, I don’t think I did too bad a job…!

Using a straight running stitch I sewed along one side, from the wide edge down to the point, kept my needle in the fabric and turned it to sew back up to the wide edge again. This gave less cotton wastage. That said, to start with I was getting into all kinds of messes and wasted a LOT of cotton. A learning curve – it’s all good!


You can see in this photo below how much of a gap I left between the edge of the fabric and the stitching, and how I took it down to the point of the fabric and back up again.


Once I sewed all the pieces of fabric together, I turned them inside out, using a chopstick to poke through the point as best I could.
With them all sewn, and reversed, and my hair pulled out :D it is time to iron them and attach them to the bias tape. I will be doing that this week, and they WILL be finished for the Jubilee weekend!

So this is where I leave you, until I add to this post when they’re all done :)
All done! Part Two can be found here!