The Queen’s Platinum Jubilee Red, White & Blue Decoupage Box Idea
Home » CREATE » Crafts » Decoupage »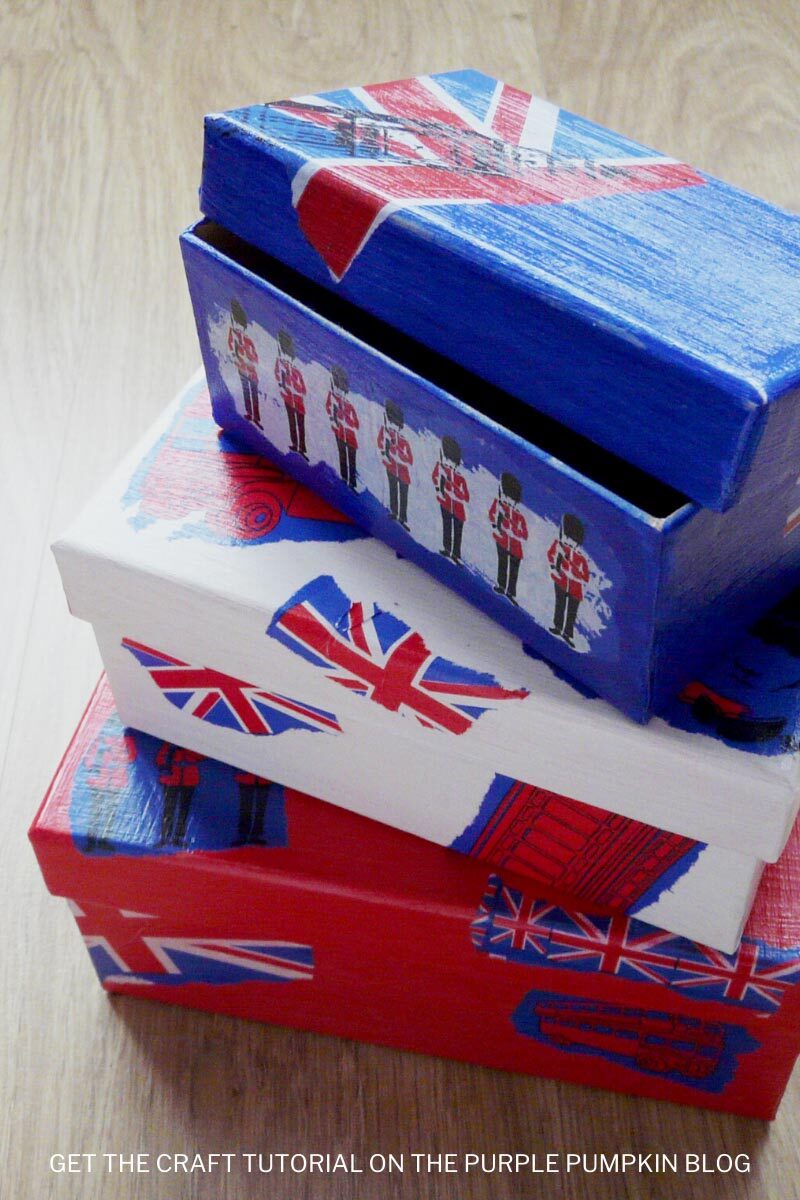

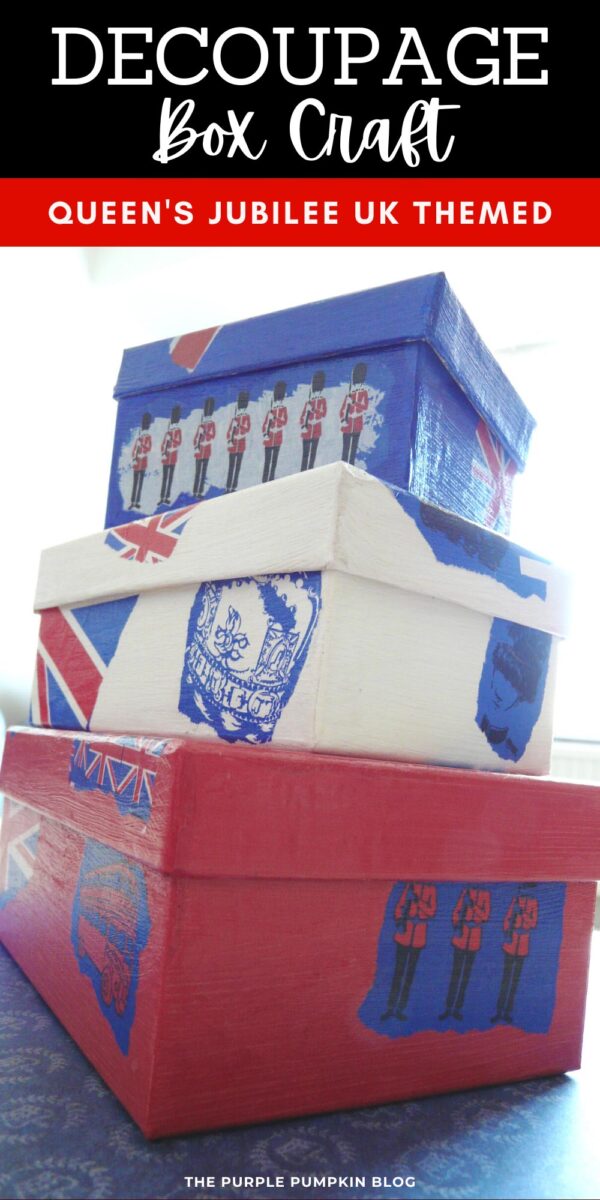
This red, white, and blue decoupage box idea is a lovely craft to make to celebrate Queen Elizabeth II’s Platinum Jubilee! Just a few craft supplies are needed for this activity which is suitable for all ages. They will make a patriotic homemade keepsake, and are great for storing your bits and bobs too!

Affiliate Disclosure
We have included affiliate links to products and services related to this post.
We may earn a commission if you purchase after clicking on those links.
As an Amazon Associate, I earn from qualifying purchases.
Read Our Full Disclosure Policy and Privacy Policy
Decoupage Box Idea
The full list of materials, tools, and instructions is found in the printable tutorial card at the end of this post. I highly recommend reading the blog post all the way through before starting this project to ensure that you have everything required and understand the steps and timings involved.
I originally came up with this decoupage box idea for the Queen’s Diamond Jubilee in 2012, and I loved how they turned out!
Here we are 10 years later, and about to celebrate Her Majesty’s 70 years on the throne – something which no other monarch has ever achieved!
Decoupage or découpage is the art of decorating an object by gluing colored paper cutouts onto it in combination with special paint effects, gold leaf and other decorative elements. Commonly, an object like a small box or an item of furniture is covered by cutouts from magazines or from purpose-manufactured papers.
Wikipedia
Decoupage is one of those crafts that looks like it takes a long time and requires lots of skill, but it’s actually so easy, that even kids can do it!
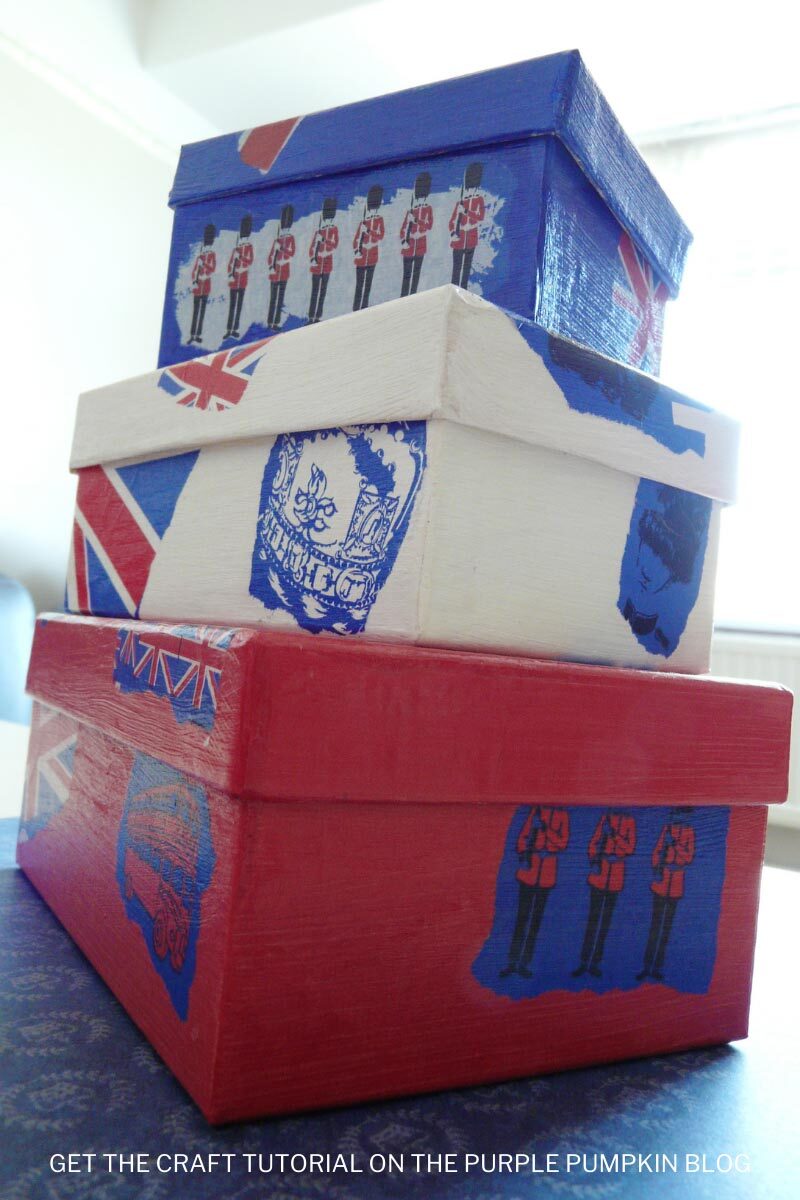
I used small (stackable) cardboard boxes with lids and used the colors of the Union Flag – red, white, and blue as the initial layer.
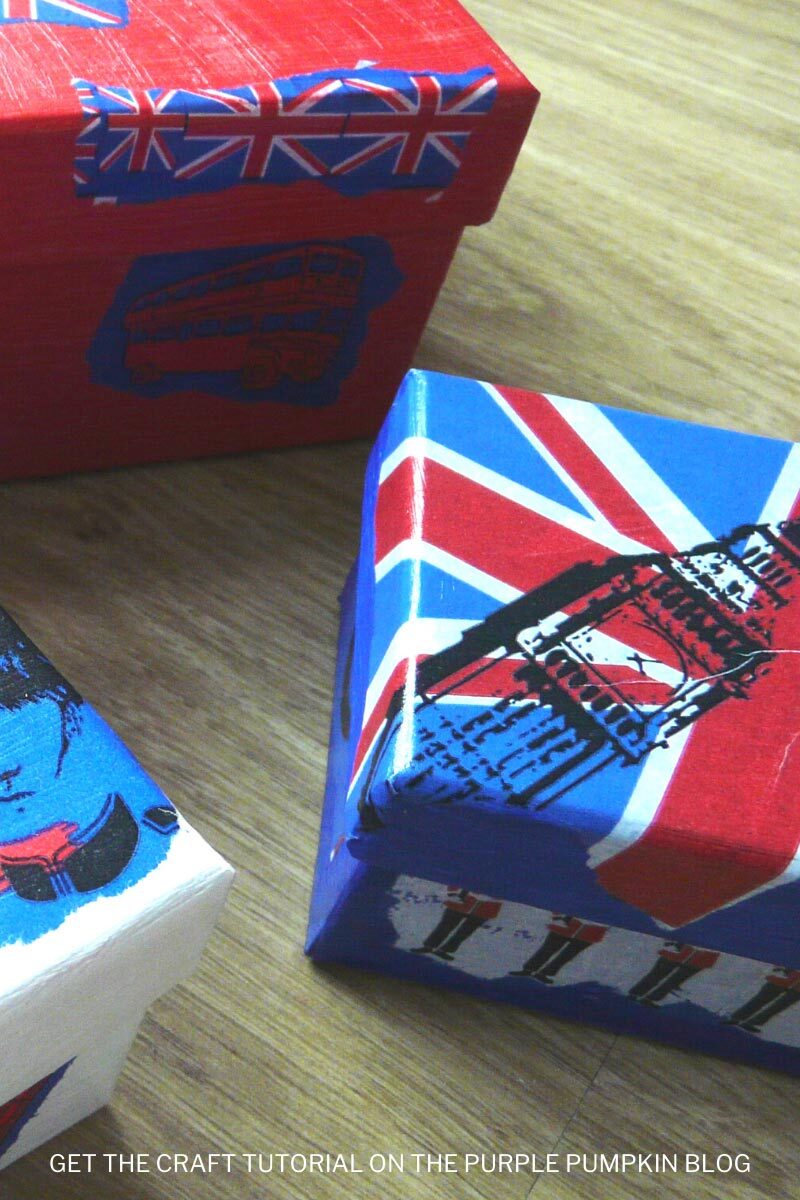
I then used some watered-down white school glue (PVA) to apply torn pieces of Decopatch® paper, which I of course bought way back in 2012. It matched my color theme and had images of the UK and London with red telephone boxes, the Union Flag, and the Royal Guards to name a few.
The Decopatch® paper is very thin, pretty much like tissue paper. However, you can decoupage with patterned paper napkins/serviettes (just peel the 2 or 3 layers away from the top layer before applying to the boxes), if you can’t find specific Decopatch® papers.
You can even use pictures from newspapers, old books, and magazines! You want the paper to be pretty thin and pliable, so bear that in mind with your choices.
To finish off your work a layer of sealing varnish is added. I used Decopatch®, but another brand you can use is Mod Podge. Both come in a variety of finishes.
Materials & Tools Used in This Craft
The complete list of supplies, which may include basic crafting items that you already have can be found in the tutorial card at the end of this post. For your convenience, I’ve linked any notable materials and tools needed for this project to Amazon below.
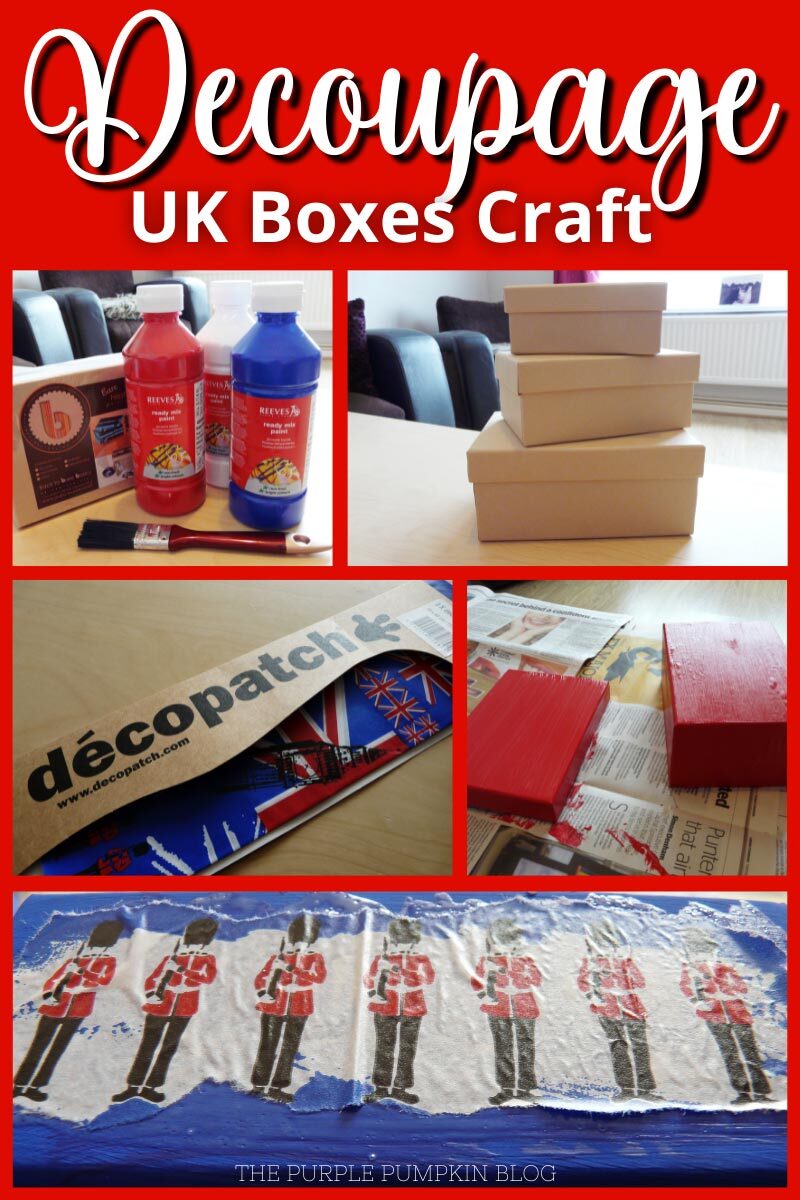
- Small Cardboard Boxes – you can use any size you like. You need them to be made of strong cardboard, and possibly labelled for use in decoupage or paper mache.
- Acrylic Paint – red, white, and blue to represent the Union Flag.
- Paintbrushes – I used a flat paintbrush for painting, but you could use a sponge brush too. You also need brushes for appling the glue, and the sealing medium.
- Decopatch® Papers – I did make these boxes 10 years ago now, so you may not be able to find the exact papers I used. However, you can use any designs you like on your boxes. You could also use paper napkins, just peel away the layers, so you only decopage with the very top design layer. You can also decoupage with pictures from magazines, books, and newspapers!
- White PVA (School) Glue – use this watered down 1:1 to apply the papers to the boxes.
- Decopatch® Sealing Varnish – you could also use Mod Podge, which is a glue and sealant in one.
Cheap Craft Supplies
A great thing about this craft idea is that it’s very budget-friendly using supplies you may already have or can be purchased cheaply in stores:
If you’re in the USA, check out your local Dollar Store or Dollar Tree; and if you’re in the UK, the Poundshop, The Range, Wilko, and Baker Ross are great places to shop for cheap and inexpensive craft supplies. The rest of the world reading this – I don’t know every cheap store – sorry! But hunt the ones out in your location for crafting bargains!
More Jubilee Crafts
Looking for more crafts to make for the Jubilee? Here are some more for you to check out! Just right-click and open a new tab to read next!
- How To Make Fabric Bunting
- Hand Painted Crockery
- How To Make Union Jack Canvas Art
- Giant Tissue Paper Rosettes – I made these for the 2012 Olympics, but switch the colors to make them for the Platinum Jubilee!
These crafts are for the 4th of July, however, with the red, white, and blue colors of the USA flag, they can easily be swapped for the UK flag!
- Red, White & Blue Patriotic Wreath Craft Using Felt Scraps
- Make These Patriotic Pinwheels for 4th of July!
- Red, White & Blue Paper Flower Wreath
I’ve shared lots of great craft ideas on The Purple Pumpkin Blog over the years, in fact, there are 100+ crafts to make and do at home for you to try!
How Do I Make Decoupage Boxes?
Just check out the how-to card below with full materials, tools, and instructions. Any demonstration photos do not print out to save your ink.
Red, White & Blue Decoupage Boxes (British Themed)
Materials
- Set of 3 Small Stackable Cardboard Boxes
- Acrylic Paint – Red White, and Blue
- Decopatch® Papers or Paper Napkins – red white, and blue/UK/London themed
- White PVA School Glue – watered down 1:1
- Decopatch® or Mod Podge Sealing Varnish
TOOLS
- 2 Flat Paintbrushes or Sponge Brushes
- Small Round Paintbrush
Instructions
- Remove the lids from your boxes, and using a flat brush, paint one box and lid with red acrylic paint, another with white acrylic paint, and the final one with blue acrylic paint. Leave to dry and apply a second coat if required.
- When the paint has dried, take your papers and gently tear around the different sections of pattern or images that you would like to use on your boxes. There is no right or wrong way to do this! You can use scissors if you prefer to cut the images, but I prefer the torn look.
- Before sticking the torn pieces down, roughly plan out where they are going to sit on your boxes. You can cover a whole side, or just a little part, and even wrap around from one side to the other. Again, there is no right or wrong way to do this!
- Using some watered-down white school glue and a round paintbrush, liberally apply glue to the back of the paper and place it onto the box where desired. You can add some more of the glue on top, paying particular attention to the edges to make sure that they lay flat. Leave to dry.
- When the papers have dried, use a flat brush or sponge brush to apply a layer (or two) of sealing varnish. Make sure to apply evenly and cover all areas to protect and seal your decoupage work. Leave to dry.